Phone: For support in Australia, call 1300 401 111 and select option 3 for Bp Allied. Next, select option 1 for Support or Option 3 for Training. For support in New Zealand call 0800 401 111 and select option 3 for Bp Allied. Next, select option 1 for Support or Option 3 for Training
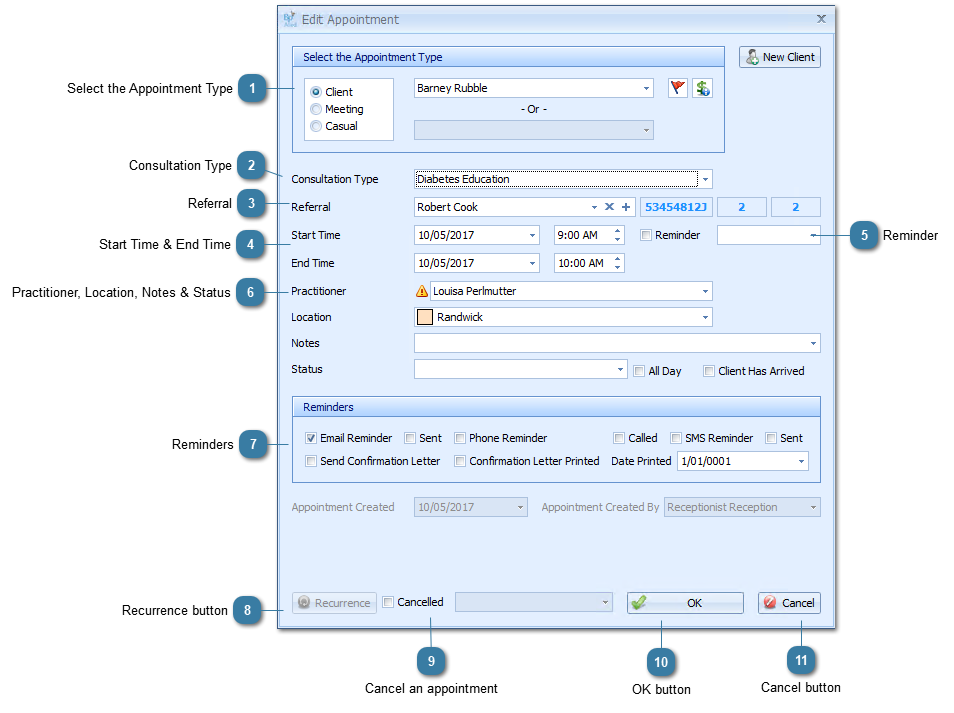
Edit an Appointment
With the Appointment Book open
Double click on the appointment field
The EditAppointment form will display
All fields within an appointment can be edited except for the the ApppointmentCreated and AppointmentCreatedBy fields.
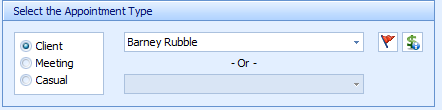
Select the Appointment Type
Click on the radio button to change the appointment from a Client appointment to a Meeting
Use the drop down arrown to change the Client (or Meeting) selected
Click on the X to remove any referral associated by default. A client appointment does not have to be associated to a referral but will automatically associated if there is a referral ticked as a Current Referral.
Use the drop down arrow to change the values displayed.
If the Practitioner is changed then the Location will change to the location setup for that Practitioner for the date and time in Practitioner Availability.