Phone: For support in Australia, call 1300 401 111 and select option 3 for Bp Allied. Next, select option 1 for Support or Option 3 for Training. For support in New Zealand call 0800 401 111 and select option 3 for Bp Allied. Next, select option 1 for Support or Option 3 for Training
Xero
The process below needs to be followed and settings filled in to allow Bp Allied to access your Xero account and transfer across information. You will need a Xero account prior to undertaking this process.
The Xero settings can be accessed via System > Options > Financial Exports.
Click here for details on running the Xero export report.
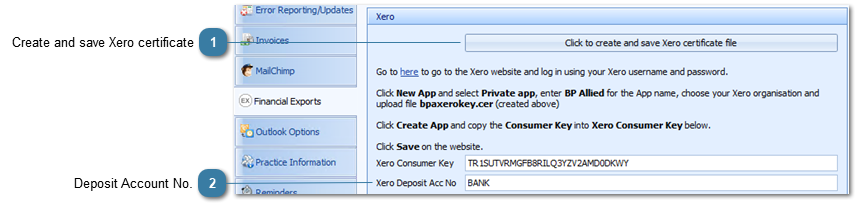
Create and save Xero certificate
Click on the button Click to create and save Xero certificate file to save the validation certificate. Please make a note of the location that the certificate is saved to. The file is called bpaxerokey.cer.
Use the link on the Options screen to go to the Xero website and log in using your usual login name and password.
Click New App
Select Private App
Enter 'Bp Allied' for the App Name
Select your Xero Organisation
Upload the bpaxerkey.cer file created above
Click Create App
Copy the Consumer Key and save it into Xero Consumer Key
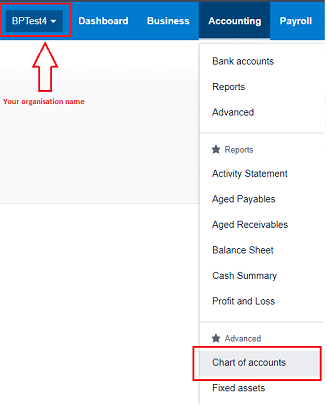
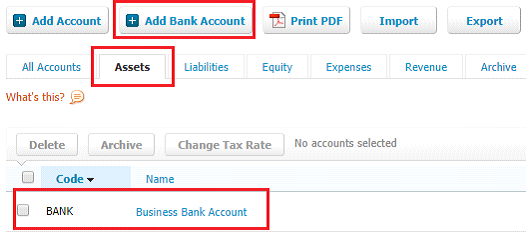
Go to the Assets tab and find the Bank Account code just set up
Enter this Code e.g. BANK into the Xero Deposit Account No
NOTE: Because payments are exported as overpayments, they first go into the Overpayments 610 default Xero account prior to them being allocated to an invoice. Please see the Limitations page for details about this and other Xero integration limitations.